Back on High Sierra when I wanted to tether my MacBook Pro to my iPhone and save some battery power, I used Bluetooth and chose “Connect to Network” through the Bluetooth icon up in the menu bar. In Big Sur, that changed: when you go to the Bluetooth menu and choose your iPhone, it briefly connects and then disconnects.
I found that the “Connect to Network” option is now buried. Assuming you’ve already paired your iPhone via Bluetooth to your Mac, you can enable Bluetooth PAN using the following:
1. On your Mac, open “System Preferences”. 2. Click “Bluetooth”. 3. Right-click on the name of your iPhone and choose “Connect to Network”.
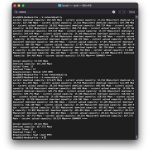
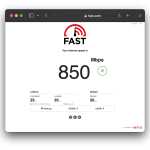
You’ll now be tethered to your iPhone via Bluetooth PAN. I only do this when I have low bandwidth needs and plan to stay tethered for a long time on battery power. In limited tests with speedtest.net and a tethered Bluetooth connection on Total Wireless, my macbookpro12,1 gets about 0.75 Mbps up and down. When tethering via wifi, the bandwidth jumps to about 40 Mbps down and 7 Mbps up. Finally, tethering via USB was nearly the same as the wifi-tether, although via USB the ping time dropped by 10 ms. This is with crude testing of one sample run for each connection type.
Riding in the Nemo’s brand new Canyonero was outstanding and I told Liam and Ella all about it. Inspired by the vehicle’s high-tech gadgetry, Liam and I talked about upgrading our New Beetle with a flat panel display. I told him about Adam Bell’s Ignition and mentioned the idea of repurposing our old iPad 4 to the Beetle’s dash. He seemed to be game, so we looked more into it.
By installing a semi-tethered jailbreak and ReProvision, we could keep everything signed on the jailbroken iPad. Unfortunately, our iPad 4 has been upgraded to iOS 10.3.3 and Ignition is only compatible with iOS 8.1, 8.2, and 8.3; while it’s possible to downgrade the iPad’s iOS, we can only get back down to 8.4.1 and Ignition doesn’t run there.
Not easily giving up, we found CarPlay iOS, available through Cydia for $4/license and ventured on. Next step: jailbreak the iPad.
The iPad 4 is 32-bit and Big Sur and Xcode 12.3 only sideload to 64-bit devices. We have a Mac mini still rocking High Sierra and after reviewing this guide we grabbed a 32-bit compatible version of Xcode to side load the iPad 4 jailbreak using these instructions:
Get access to a Mac running High Sierra
Install Xcode 8.3 from here: https://developer.apple.com/download/more/
Launch Xcode 8.3 and tap Agree on the License Agreement
Connect your iPad to your Mac and, if asked, tap “Trust” on the iPad
In Xcode, choose your iPad as a Build Target, go to Product->Destination->Devices->(choose your device), quit Xcode, and then open Xcode again
Create a new application (File->New->Project…), choose Single View Application, and give it a name (e.g. break) and an identifier (e.g. jail)
Xcode will then ask where you want to save the project, choose the desktop for simplicity
Go to the Xcode menu and choose Preferences…
Click the Accounts button, in the left hand pane click the “+” sign, and add a profile by logging in with your Apple ID (you do not need an Apple Developer account, an iCloud account works fine)
In the right hand pane, you should now see your name followed by “(Personal Team)” with the role “User”
Drag the .ipa file modified by patch.sh and drop it on to iOS App Signer’s “Input File” field or click Browse and navigate to the .ipa on your desktop
In iOS App Signer, go to the dropdown menu for Signing Certificate, choose the Apple Development certificate with your name, click “Start”, and iOS App Signer should produce another modified .ipa on your desktop
In Xcode, go to the menubar and click on Window->Devices
Locate your connected device in the list and click the + sign
Choose the file iOS App Signer just created for you
Moving to your iPad, notice an .ipa will appear on your device home screen, but don’t launch it yet
Tap Settings->General->Device Management
Find and tap the new profile
Tap “Trust” and the .ipa you installed can now be tapped
To keep the jailbreak intact, we also installed ReProvision through Cydia. Fire up Cydia.app, go to Sources->Edit->Add, enter “http://repo.incendo.ws”, and tap “Add Source”. In Sources, tap Matchstic->System->ReProvision->Install. From the home screen of your iPad, tap “ReProvision” and on the right hand side of the screen and “h3lix” as an app to sign and then tap “Sign”. It will take a minute or so, but eventually ReProvision will sign the app and then continue to sign the app when it is within 2 days of expiring.
In a bid to bring automatic wildcard renewal of SSL letsencrypt certificates to my Mac mini running macOS Server, I used Eric’s instructions and only tweaked one line in the section “Creating the certificate” by changing this line:
When –preferred-challenges=dns is used, I had to create a TXT record with my registrar, but after you doing this once for each domain it shouldn’t be necessary again. I’ll report back when I know the rest of Eric’s scripts are working.
** Update 1-28-2022 **
I switched to using Bernard Teo’s Webmon, OpenVPN, and letsencrypt and I couldn’t be happier. I’ll do a follow-up post/review on my experience soon.
I have yet to bring our fat bikes anywhere by car with a new Curt 18085 bike rack we picked up for two reasons:
1. We need to pick up the tensioning strap that takes some bounce out of the rack
2. The rack has padded arms that hold the frame and I’m concerned about potential frame rub
To fix #1, I’ll pick up Curt’s recommended 18050 strap. For #2, the cheapest workaround may be to identify what part on the bike frame will contact the rack’s padded arm, clean the bike frame’s identified area, and then place a frame sticker/piece of packing tape on the identified frame area before loading it into the rack. Fortunately, I’ve got a bunch of large frame stickers that I picked up cheap on eBay that I can burn for this task. I’ll report back on how it works in the wild.
** Update 7-21-2021 ** The frame stickers work great and this rack has been outstanding. Even better, this rack accommodates my Surly Big Dummy, a double-bonus I hadn’t anticipated!
Prior to this post, my Dummy had Rohloff shift housing and cables installed, which are adequate, but after enjoying Yokozuna’s strong Reaction brake housing and cables I knew I had to try their shift housing and cables. On the Big Dummy’s long cable run, the compressionless brake housing brings responsiveness I haven’t seen in other housings and I’m hoping for something similar with Yokozuna’s shift housing and cables.
First thing I noticed after pulling the Yokozuna Shifter Cable Set from the packaging is that the housing has a smaller diameter than Rohloff’s cables, so much that I had to measure the difference: Rohloff housing has a 4.8 mm diameter and Yokozuna has a svelte 4.1 mm diameter. I didn’t weigh the two, but I’d expect a difference.
To fit the cable housing to the Dummy, I ended up cutting 50 mm of housing from the lengths provided by Yokozuna, I aimed for twin 2250 mm housing lengths and this proved useful, as I later had to switch the cable positions around and cut off another centimeter.
After getting the cables on the Dummy in my shop and running through the gears, I can already say I’ve never felt my Rohloff shift through gears this smoothly. I’ll verify this with the Dummy out on the road tomorrow and come back with an update, but I’m already tickled to now have Yokozuna on my front brake and shifter. Note, a future post might be when I’m able to return Yokozuna to the rear brake, which is where the most noticeable benefit is seen on this bike – I expect to do this when I replace the rear caliper after this winter.
I’ll pass this back to Merry Sales, but the set includes cable caps and these are superfluous to Rohloff internal and external mechs.
** Update 12-4-2020 **
I’ve ridden the Dummy a few times now and will re-state how smooth and easy shifting is with Yokozuna shift housing and cables. I’m hoping this holds up!
My son has been using Catalina on his 2009 Mac Pro (macpro4,1), firmware upgraded to a macpro5,1 over a year ago. Catalina and OpenCore 0.58 along with his RX580 4GB have been excellent. He can select any of his 4 disks at boot time through a graphical user interface and OpenCore helps with system updates by tricking Apple’s software into believing your Mac is no different than a natively supported machine.
With Big Sur now available and OpenCore at 0.63, he was ready to upgrade his Mac. We backed up his data and proceeded to follow these instructions, everything through Part I seems to be running fine. Will report back after we update through Parts II and III. Also, unless things have changed with the instructions above, this video found from this forum shows how to modify the EFI so that Big Sur can be updated – note, the instructions in this video should be reversed when you are done with Apple’s updates and you want to optimize speed of your Mac Pro. Also note, we were spared from having to mess with Clover to enable the onboard ethernet through the Intel Mausi Kext, I believe the config.plist file linked within the instructions above helps to enable this for Mac Pro hardware.
Last note for now: we find that Clover Configurator works well for mounting the EFI and also, the drive in the SATA bay seems to contain the EFI that needs editing, not the EFI on the NVMe SSD. If we had removed the SATA drive from the Mac Pro, the NVMe’s EFI would probably be the main drive initiating OpenCore at boot time.
My “snowpup” wouldn’t fire up today to hit a few inches of fresh stuff that landed and that was disappointing, as 4 days earlier when it was 70 degrees it fired up just fine.
I committed a few errors from last winter:
1. I left treated gasoline in the tank.
2. I may not have pulled the cord until there was minor tension to seal off the intake valve.
After pulling 50 times, I figured I checked the gas tank and it was mostly empty. I topped the tank with fresh fuel, 50:1. I went to start it again and no dice. I pulled the spark plug out and it was soaked in fuel. Ugh. Dried the spark plug tip and put it back in. Pulled the cord, still nothing. Figuring something else was wrong, I brought it into the trusty Schwie Shop in the basement.
After a few hours of warming up, I pulled the bottom cover off (2 screws!) and found another problem. The primer hose broke off just behind the bulb. Argh. Worse, the primer line was leaking fuel out the broken end. Surely this is contributing something to the problem. For now, I’m putting a small binder clip on the end of the hose and I’ll order one of these:
44-2750 Body – Primer
While tinkering inside the motor area, I remembered the choke was flinging back and forth last winter. Looking at the parts list it appears the choke is missing a few parts:
Next, I wanted to see if the snow blower was making a spark, so I removed the spark plug, reattached the plug wire, laid the tip of the plug so it was touching the outside of the motor, turned out the lights in the shop, and gently pulled the cord. Boom, a blue spark jumped across, yes! That means I don’t a plug or a plug wire, so I reassembled the machine and brought it out to the garage. First pull and it fired up!
Now, there were several things wrong with this snowblower and some conditions changed, including warming it up to room temperature. I’m still in the process of the repairs as I’ll need to get more parts, but here’s my weak connection of dots as to why it worked 4 days ago and suddenly didn’t today:
I pulled the snowblower out of the garage attic where it was stored on all 4 wheels, brought it outside, fired it up, turned it off, and then hung it by its handle inside the main part of the garage (mind you, last winter’s treated gas was still inside). Jump to today, I take it off the hook in the garage and try to fire it up, nothing. I think what happened was last year’s residual fuel doesn’t want to combust when its cold, but it’s willing to when it’s a few degrees warmer. To test this theory, I’ll run out to the garage tomorrow morning and give it a pull. If it fires up, I’m going to chalk it up to the fact that the old fuel is now burned out and mixed with enough new fuel that its willing to combust. If it doesn’t start up, it’s because I haven’t run it long enough to combust all the fuel in the hose. More later…
** Update 11-16-2020 **
I pulled started the snowblower a couple more times over the next couple days and it started with fewer and fewer pulls until it started with a single pull, I’m pretty sure the cause was old gas in the line.
I went looking to purchase individual parts to make the above repairs and it came to about $20 in parts, so I ended up purchasing a carburetor assembly for $12.95 shipped from Amazon. Will install that soon to fix the broken primer bulb body and loose choke handle – the new carburetor seems to be built better than the original.
My kids are both left-handed and they each have a sweet Ibanez guitar, AEG18LII-VV. My son broke a string recently and when I attempted to look up string specifications at Ibanez.com, nothing appeared and these are pretty new guitars.
After calling Ibanez, the helpful rep said that specifications for this guitar are not listed their website, because it was manufactured as a proprietary model; however, he said specs for the AEG18L and -19L are similar. He said the guitar could use a string kit that ranges from 12-53 or 12-54, with the individual gauges being:
12, 16, 24, 32, 42, and 53
He said kits may be marketed under the following makes:
I should have replaced our American Hot Water Heater VG6250T76NV’s magnesium anode years ago – COVID continues to give me a chance to catch up. Note: I’m assuming this water heater shipped with a magnesium anode, not an aluminum anode.
I measured the distance above my hot water heater and while my installation may allow clearance to fit an OEM 32-inch anode, it seems it will be very tight and may not fit. After watching an excerpt from This Old House, I learned about a collapsible or flexible anode that has been developed, so I’ll go that route so I don’t have to try and move plumbing out of the way.
If I had selected the non-flexible OEM part number, sold by a local supplier, Dey Appliance, they recommended this part calling for a 32-inch length anode with 3/4″ NPT, and 0.84-inch diameter. Ultimately, I selected an ApplianPar flexible magnesium anode, mostly because its close to meeting the specifications and is readily available – yes, its a bit narrower, but I’m fine to replace the anode more often from now on – shame on me for waiting this long.I’ll update this post after I install it tomorrow, assuming I can get the old one out, which worries me a bit. Which reminds me, I need to pick up a 1 1/16 inch socket!
** Update 10-2-2020 **
Dad loaned me his 1 1/16 socket (thanks Grandpa Don!) paired with his Campbell Hausfeld impact wrench. I used this combo in lieu of my Makita LXDT04 impact driver, which produces less than 1,000 kg/cm to the Campbell Hausfeld’s ~3,000 kg/cm, hello!
The old anode (far left in picture, below) backed out in less than a minute and with it came a load of scale from 10 years of build up, see photo below. Notice that the top of the old anode bent a little bit on its way out as very little magnesium remained, which made removing it even easier. Because of it bending on the way out and my previous measurements, I think it was the right call to go with a flexible anode for the replacement. Trying to get the flexible anode to screw in is a little challenging, but it seemed to snug up with only a turn or two. I was a little concerned about that, but after turning the water back on there are no leaks at the anode’s hex fitting.
After seeing the amount of scale on the old anode, I’m beginning to think I might need to reconsider softening my water. Saint Paul water is reportedly 5-6 grains of hardness, which MPCA classifies as “moderately hard”. The anode’s scale build up makes me question the condition of the copper pipe I installed to replace the galvanized cast iron piping shortly after we moved in 20 years ago. I’m guessing there will be more on this in a future post.
This post is about taking my son’s Knard 29×3 27 tpi tires tubeless on WTB ST i40 rims.
I’m a fan of using kapton/kapten tape for going tubeless, but my only roll at home was 50mm and the i40 rims are 40mm for which WTB recommends going 5mm wider on the tape. I wanted to set my son’s tires up this week while it was still warm out and didn’t want to wait for cheap bastard kapton eBay tape to arrive, so I procured Whisky Parts Co. tape locally thanks Now Bikes & Fitness. ** UPDATE – no longer use kapton tape, its adhesive seemed to give up in the presence of sealant. **
For those who need help with going tubeless, read a guide like this one and if that link fails, the archive may render it. I pulled off the Krampus’ front wheel and removed the tire and factory tube, an Innova 29″ x 2.5″ – 3″ with a presta valve weighing in at 14.2 ounces:
I wanted to buy some solid strip rim tape, but WTB has been out of stock, so I’m stripping width off the existing rim strip and taping over that:
Which saved another 2.6 ounces (tape roll was tared):
There will be no more than 0.6 ounces of tape per wheel:
Don’t believe me? Here’s the tape roll weighed after taping both wheels:
and 0.3 ounces/wheel for a Stans No Tubes presta valve:
We taped the rim with one pass and overlapped at the valve.
I decided to skip trying to inflate the tire with the tube and thought of this approach instead: place the tire back on the rim and manually pushed one side of the tire bead into its seated position against the inner rim wall. The loose side of the tire was left hanging downward toward the opposite inner rim while the wheel laid over a 5-gallon pail – ready for air. The air compressor was set to 120 psi to get a nice burst of air connected to the presta valve body with a used scrap of 3/16-inch diameter polyethylene tubing. After a blast of air we heard two snaps/pops – the tire is fully seated!
At this point, a large amount of air stills leaks out around the rim and tire beads – now it’s time for sealant! Pull off the polyethylene tubing from the presta valve body and fill with sealant. I used 3 ounces of leftover homemade sealant from about a month ago, still in liquid form, squeezed in with a left over Orange bottle and tubing. Blow up the tire a couple times without the presta valve insert to make sure the tire is still seated and to spray the sealant around. Reinsert the valve core and continue a few blasts with the air compressor until you think you can keep it inflated long enough to start riding it. Mine looked like this:
I found that riding the tire around is when the sealant really spreads around to help hold air, but if you can’t do it safely, just spin it or bounce it next to the air compressor.
At this point I left it for the night and had to reinflate in the next couple days, several times.
I forgot to note, my homemade sealant (3 parts windshield washer fluid and 1 part molder builder) is too latex-skimpy – others recommend 3 parts windshield washer fluid to 1.5 parts mold builder, which I will try next time.
A day later Liam left for Levi’s, riding the now-tubeless Krampus and was blown away how light they felt. I tried it myself while trying to get the sealant spread around the inside of the tires. I thought wheelies felt much easier than they use to, but I may have just been giddy to have air staying inside of them.
Last thing, we used 2.5 ounces of sealant, which may need to increase as a lot blew out one side of the rim.
Let’s run the numbers:
14.2 ounces + 2.6 ounces = 16.6 ounces lost from shedding tube and rim strip
0.6 ounces + 0.3 ounces + 2.5 ounces = 3.4 ounces gained from adding tape, presta valve, and sealant.
This means the front wheel lost 13.2 ounces. The back wheel was built the same way, so Liam’s Krampus lost over 1.5 pounds of rotational mass from this conversion.
** Update 10-7-2020 **
Both tires drop about 3 psi per hour, which requires daily inflation. Surely this can be fixed, so I pulled the front wheel off and brought it inside to run it under water. I found bubbles emerging from a few discrete points from the non-disk tire sidewall. I laid the wheel on its side, disk-side up, to make sure the sealant could get to these sidewall areas.
** 10-8-2020 **
The next morning the tire was still inflated with the leak rate dropping to 1.5 psi per hour – progress! Today, the wheel will lay sideways disk-side down to see if the opposite side of the tire needs more of a sealant bath.
I still think future batches of home-brew sealant need more latex, but its also possible I didn’t add enough latex to the tires during their initial inflation with sealant. I’ve used a dipstick since then and I can see liquid sealant remains in the tire’s annular space.
** 10-11-2020 **
I remixed the sealant and boosted the ratio to 3 parts windshield washer fluid and >2 parts mold builder. I can tell the sealant looks more viscous now. I checked each tire with the dipstick and they appeared to be dry or nearly dry, so I added 3 ounces of the revised sealant to each tire. After first doing this, sealant was still coming out of the tire sidewalls in >10 discrete points. I’ll give it a bit and see how it sets up.
** 11-3-2020 **
Still having leaks a couple minor sidewall leaks and substantial leaks at the rim bead interface. It appears that forum advice of “just ride the bike” is rubbish. After inflating the tires, shake the rim while twirling it for about 15 seconds then lay the wheel on its side for 10-15 minutes much like you’ll see in this video after the 6 minute mark:
After doing this, I can already see improvement in the leaks and its holding air much longer. Doing this shake/twirl procedure is likely why bike shops say they need 1 day to complete your tubeless request. Will report back on how this goes.
** 11-15-2021 **
Was still having problems with air leaking out and figured out kapton tape doesn’t like getting wet after I inspect Ella’s a couple weeks ago: the adhesive gives up its ghost and comes apart!
I ended up tearing the kapton tape out, used Whisky rim tape, and tossed in Fatty Strippers – now it seems to be golden, the tires are staying inflated.
** 6-15-2022 **
The tires were getting low, so I put some fresh Orange sealant in and that seems to have stopped the leaks.
** 8-15-2022 **
Tires are still holding air using Orange sealant. Fatty Strippers seem to be doing their thing. Haven’t used home-brew sealant since last year, but considering another recipe:
1 part DAP Alex Plus
1 part isopropyl alcohol
1 part water
and:
2 parts liquid latex
https://amzn.to/3hVxdcj
0.25 to 1 part ammonia* (unverified, but 0.25 parts may be best for tire and rim health)
https://amzn.to/39OhE3k
2 parts anti-freeze
https://amzn.to/39Ni1eo
4 parts distilled water
https://amzn.to/3gmNEhn
5-10 handfuls of dog fur, alternative would be a few tea spoons of corn meal
** 5-6-2023 **
A few more recipes I’m interested in trying:
https://www.mtbr.com/threads/best-tubeless-brew.406115/page-217#post-14398767
1 part liquid latex “Mold Builder” brand – Amazon
2 parts distilled water
2 parts propylene glycol -Amazon or Tractor Supply
0.3 parts ammonia – Ace Hardware “Professional/Janitorial Strength”
1 tbs (or more depending on application) cooked cornmeal – Kroger
(1 part is reportedly a Stan’s red scooper – WTF, why can’t bikers describe their recipes with standard recipe units?! According to one guy it is between 60 and 63 mL.
And this recipe is similar and also sounds promising:
https://www.mtbr.com/threads/best-tubeless-brew.406115/page-218#post-14879103
2pt Propylene Glycol – for antifreeze properties in cold weather
0.3pt 10% Ammonia (Percentage strength not mentioned everywhere and handy to know if you happen to stumble upon 15%, 20% or 25%) – Keeps the latex fluid and evaporates upon exposure to the air
1pt Latex – none of the recipes mention the thickness of the latex. The thickness differs between different brands. The one I can get is 3500 mPas. This is quite thick compared to other brands…
2pt Demi water
and the coagulating agent of your choice, be it tumbledryer lint, coffee grinds, hair of dog, glitter, rubber pellets, corn starch, semolina or other “secret ingredient”.
Finally, superdez75 has a really simple one:
https://singletrackworld.com/forum/topic/homemade-sealant-current-recipes/
6oz of liquid latex
14oz of water
12oz of Propylene Glycol
1/2oz of corn meal (I use fine but I think a mix of fine and medium would be effective)
superdez75 says: “This apparently is the stans recipe, I’ve used it for years and it works well. Latex already has ammonia so I would not add any, the Propylene Glycol is used to add a bit of thickness to the mix and to stop it freezing. Some people add fine glitter for when you get a bigger puncture but to be honest I would just have a tubeless repair kit on hand.”
Final note, the Knards needed more sealant this spring, but they keep working tubeless with the Fatty Strippers – what a great way to get more life out of these tires. Also, we are careful to not put more than 40 psi into these tires, 40 psi and below and they seem to work great.