FTP download folder

Every once in a while I want to be able to download an entire folder from an FTP server. After setting the local download directory, with something like:

lcd /Users/brad/Desktop/Junk

I navigate to the directory on the FTP site containing all the files I wish to download and type:

prompt
# the command above allows the downloads to keep going without user intervention

and then
mget *.*
# mget with the above wildcard should download any file in the directory. There are any number of ways to limit it, for instance, if you only want .csv files use the following command:

mget *.csv

Homebridge Enhancement

I’ve been running the open source Homebridge project on a Mac mini, now on Monterey, with several plugins and good success. I remember reading about setting the plugins as a child process to offer improved responsiveness when accessing HomeKit on an iOS device. These instructions show one of the ways to create a child process.

Prerequisites for this are running homebridge and a venerable plugin, homebridge-config-ui-x, then:

1. Access your homebridge installation using the web ui provided through homebridge-config-ui-x.
2. Near the top of the browser window, click “Plugins”.
3. For the plugin you wish to be more responsive, tap the wrench to the lower right of its name and choose “Bridge Settings”.

4. Slide the child toggle to the right, click “Save”, and then restart homebridge.

to

5. In Home.app on your iOS device, click the “+” and then “Add Accessory”.
6. Click “More options…” and choose the accessory that you turned into a child bridge above.

Before completing step 6, you may want to delete any plugins that were previously added as a non-child bridge. And when adding the new child bridge, follow the questions and prompts that Home.app presents to you.

That’s all, the plugin you enabled as a child bridge. I’ll continue to test this feature and report back here how it is working.

Faster First-Time Time Capsule Backup

Turns out this post is a draft in process – the instructions work up until step 13, lucky 13! If I continue to update this, I will look at instructions here, here, here, here, and maybe even here.

*************************************************

My macbookpro11,4 rocks a 2TB SSD and over half of it is full. I jailbroke our Time Capsule and successfully transferred 3 Time Machine backups, but the backup for my macbookpro11,4 got messed up. Rather than troubleshoot further, I decided to erase the macbookpro11,4’s sparsebundle from the Time Capsule and start fresh. A first-time backup to our Time Capsule would take days to transfer this much data from the macbookpro11,4 and the first backup would likely be disturbed every time I pull my macbookpro11,4 off the local network and go somewhere.

To speed this up, I had the macbookpro11,4 complete its first-time backup to a FireWire 800 2TB hard drive, which took 6 hours. I then moved the FireWire drive to a desktop computer that stays on my network. Fortunately Aaron Cohen has kindly published instructions for what I proposed above. I’ve ever so slightly tweaked those instructions, here:

  1. Preferably using USB, FireWire, or Thunderbolt, connect an external hard drive to your Mac you wish to backup and complete a Time Machine backup.
  2. Make sure your computer has a name in System Preferences -> Sharing or your first Time Capsule backup could fail.
  3. Set up your Time Capsule using the AirPort Utility. When you’re done, you should be able to see the Time Capsule under Locations in the sidebar of a Finder window.
  4. Mount the Time Capsule drive, by selecting the Time Capsule in the sidebar, and then, if necessary, clicking the Connect As… button and entering your Time Capsule password (that you set up in the AirPort Utility).
  5. You should then see a folder called Data, representing the internal disk in your Time Capsule.
  6. Double-click on the Data folder to open it; it should be empty.
  7. From the Mac you wish to back-up over your Time, open the Time Machine preference pane, click “Select Backup Disk…”, and choose your Time Capsule from the list.
  8. From the Time Machine menu on your Mac, click “Back Up Now” to force Time Machine to start backing up to your Time Capsule. Once it starts whirring along, look in the Time Machine preference pane and you should see “Backing up X MB of Y MB” or check out the Finder window that was showing the contents of your Data folder where a sparsebundle file should now appear. When either of these conditions are true, cancel the Time Machine backup as we only started it to create a sparsebundle file that we’ll use later. When your Mac stops backing up to the Time Capsule, turn Time Machine off on your Mac.
  9. Download SuperDuper!, which is an excellent backup and disk copying application. The free version is all you’ll need, but if you like it, I recommend the full version to support Dave Nanian and his super effort.
  10. Move the external hard drive to a computer on your local network. Preferably this computer will have an ethernet connection (preferred) to your Time Capsule
  11. From the Time Capsule Data folder, double-click the sparsebundle file that was created moments ago. Doing this should mount a new drive Time Machine green icon on your desktop called “Backup of [your computer name]”.
  12. Launch SuperDuper, set it to copy your old backup drive to “Backup of [your computer name]” with “Backup – all files”, and click the “Options…” button and under “During copy” choose “Erase Backup of [your computer name], then copy files from [your computer’s hard drive name]”, click “Copy Now”, and enter your credentials when SuperDuper! prompts you.
  13. This transfer will take a while, but at least your MacBook device is free to leave the network. It appears my 1.2 TB of backups will take at least a day, copying from a FireWire 800 drive to a Mac mini ethernet connected to a Time Capsule.
  14. When the Mac mini to Time Capsule transfer finishes, re-visit Time Machine preferences on your MacBook select your Time Capsule as the backup drive and check the box for automatically backup.
  15. Either enter Time Machine to verify that your backup history is still present or run another backup to verify connectivity. The first network based Time Machine backup after the copy described above may take a while during the Preparing… phase, but after that it should be working.

Thanks for setting us up, Aaron! Before finding Aaron’s instructions, I also checked out Pondini’s old site and a couple Apple Exchange sites, but Aaron’s website was the best.

OpenCore Legacy Patcher

Courtesy of OpenCore Legacy Patcher, my older macmini5,3 and macbook6,1 have been running Monterey smoothly. With macOS Ventura due later this year, I will likely move our macpro5,1, macbookpro11,4, and macbookpro12,1 machines to Ventura and also need to use OpenCore Legacy Patcher. Before we do that, I want to jot down instructions for upgrading Ventura for these machines and Ventura is not running well on OpenCore Legacy Patcher just yet. The instructions below are based on Mr. Macintosh’s video on upgrading Monterey with OpenCore Legacy Patcher, but I expect these steps to be the same or similar:

1. Backup your machine! (I recommend a bootable backup in addition to a Time Machine backup if you can afford the space).

2. Update macOS like you would on a supported machine (click Apple logo->About This Mac->Software Update…->Advanced…->Ok->Update Now. Adding clicks for “Advanced” and “Update now…” might allow your Mac to update faster if it already had a chance to download the patch. This will probably take about an hour and ends with your Mac needing to restart. If your Mac doesn’t install the update, skip to the next step and then repeat step 2 at the end.

3. When your Mac boots back up, run the latest version of OpenCore Legacy Patcher, get it here. Fire up the OpenCore Legacy Patcher application and then we will build and install OpenCore to the boot drive EFI. Before you do build and install, you might want to change the bootpicker to false if you don’t want your Mac users seeing extra options during boots or restarts (and you can still get to these by holding down the option key at start-up). Build and install OpenCore to the boot drive’s EFI. Also, to get macOS system updates to load, you’ll need to set spoofing to “minimal” through OpenCore Legacy Patcher).

4. This step is not needed for Metal Macs. For non-Metal Macs, run OpenCore Legacy Patcher and then click “Post Install Root Patch”, click “Start Root Patching”, click “Yes” to give OpenCore Legacy Patcher root access, enter your credentials when prompted, and when prompted click “Reboot” and then “Restart” to restart your machine. This step will load the proper GPU graphics drivers and more to speed up your Mac.

Expect to see edits to these instructions as I continue bringing our legacy hardware to Ventura. Also note, I started using the text-based interface and moved to the GUI OpenCore Legacy Patcher interface since the two codebases should be in sync, at least according to Mr. Macintosh that is true. OpenCore Legacy Patcher will be called OpenCore-patch when it is sitting in your Applications folder or wherever you install it. Ventura will not

Jailbroken Time Capsule and scp

After jailbreaking each of my Time Capsules, I wanted to transfer a pair of .backupbundle files, but they refused to transfer via Finder, so much for drag and drop compatibility. Just as well, there’s a secure way to do it via Terminal.app using these instructions:

1. In macOS, mount a disk from each Time Capsule drive you’d like to pass information between. (*this step is mandatory, if not, the path /Volumes/dk2/ShareRoot in the following steps will not be accessible)
2. Open Terminal.app.
3a. To transfer data from your Time Capsule to a drive mounted locally, execute this command from your Mac:

scp -3 -r root@10.0.1.15:/Volumes/dk2/ShareRoot/tina.backupbundle /Volumes/WD\ 4GB\ Backup

3b. To transfer data between a pair of Time Capsules, this command should work:

scp -3 -r root@10.0.1.15:/Volumes/dk2/ShareRoot/tina.backupbundle root@10.0.1.1:/Volumes/dk2/ShareRoot

4. You can continue to monitor the status of the transfer in the Terminal.app window, this will likely take several hours if the .backupbundle file is more than a terabyte.

If you are doing this transfer, you too may be like me and finding your internal Time Capsule drive out of space. If you make a secure shell connection to your Time Capsule, you can execute the following command to find out how much space remains on the Time Capsules internal storage and disk drive:

df -h

Filesystem Size Used Avail %Cap Mounted on
/dev/md0a 15M 11M 4.5M 70% /
/dev/flash2a 2.7M 63K 2.5M 2% /mnt/Flash
tmpfs 16M 4.0K 16M 0% /mnt/Memory
/dev/dk2 2.7T 2.0T 746G 73% /Volumes/dk2

In the case above, only 0.7 TB remained on the storage disk and I needed a bit more to fit everyone in the family…

** UPDATE 11-16-2024 **

Due to funkiness with DSS and macOS, step 3b failed for me today. To get around this, I logged into one Time Capsule at 10.0.1.15 and issued the following command to copy a backup file from 10.0.1.1:

scp -3 -r root@10.0.1.1:/Volumes/dk2/ShareRoot/Pro.sparsebundle /Volumes/dk2/ShareRoot

So far it’s happy and continues to copy. Will check back if/when this fails/succeeds. Based on initial transfer speeds, it’s averaging about 5.5 MB/s, I can live with that though copying 2TB may take the rest of the weekend! At least the two Time Capsules can sort this out between each other and don’t need an intermediary machine, which step 3b attempted to offer.

basement-shop-airport-time-capsule# scp -3 -r root@10.0.1.1:/Volumes/dk2/ShareRoot/Pro.sparsebundle /Volumes/dk2/ShareRoot
The authenticity of host ‘10.0.1.1 (10.0.1.1)’ can’t be established.
RSA key fingerprint is 35:f9:2a:02:ac:5f:9f:f7:6a:21:33:1c:27:d7:7e:b4.
Are you sure you want to continue connecting (yes/no)? yes
Warning: Permanently added ‘10.0.1.1’ (RSA) to the list of known hosts.
root@10.0.1.1’s password:
0 100% 256MB 4.6MB/s 7.4MB/s 00:56
1 100% 256MB 5.5MB/s 7.4MB/s 00:47
10 100% 256MB 5.5MB/s 7.4MB/s 00:47
100 100% 256MB 5.6MB/s 7.4MB/s 00:46
1000 100% 256MB 5.6MB/s 7.5MB/s 00:46
1001 46% 120MB 5.7MB/s 5.6MB/s 00:24 ETA

Also, before I executed the above command:

trap '' HUP

The above command allows the scp command to continue in the background even after I disconnect the ssh session. To verify this, I closed the Terminal window on my Mac and then reconnected and executed top, sure enough, scp is still going off:

load averages: 2.19, 1.89, 1.49; up 0+01:53:38 01:09:23
32 processes: 8 runnable, 23 sleeping, 1 on CPU
CPU states: 49.5% user, 0.0% nice, 44.4% system, 6.1% interrupt, 0.0% idle
Memory: 137M Act, 68M Inact, 124K Wired, 5584K Exec, 185M File, 7192K Free
Swap:

PID USERNAME PRI NICE SIZE RES STATE TIME WCPU CPU COMMAND
967 root 29 0 24M 5500K RUN 5:57 68.46% 68.46% ssh
244 root 85 0 23M 2120K RUN 4:21 15.53% 15.53% mDNSResponde
1220 root 84 0 21M 1844K RUN 1:03 10.25% 10.25% scp
486 root 43 0 21M 2276K CPU 0:00 0.16% 0.15% top

NetBSD on Apple Time Capsules is the bomb.

Sintech ST-NGFF2013-D and QNINE

I’ve been hot-rodding older MacBook, MacBook Pro, and MacBook Air machines for a few years with NVMe SSD drives and Sintech and QNINE adapters. I’ve found just about every NVMe drive, if properly formatted, will work with these machines; however, I have noticed several times now where these machines break into kernel panics, as shown below and discussed by others, with the first line of errors that would typically be seen in Apple’s Bug Reporter:

panic(cpu 0 caller 0xffffff80207597c6): nvme: "3rd party NVMe controller. Loss of MMIO space. Write.

In the past I resolved these errors by ordering a new adapter and then things were fine again. I had a couple bad adapters (the original ST-NGFF2013 and QNINE) and decided to use my trusty 10x loupe to look closer at the failed PCBs. As shown in the pictures below the outer pins near the edge of the rev. C/D board pulled away from the Sintech ST-NGFF2013 rev C adapter, seemingly no longer soldered to the board:

I also looked at a failed Sintech ST-NGFF2013 (sorry, no pictures) and found the outermost pin (ground?) had cracked away on one side.

I made a warranty claim to Sintech on the rev. C/D board, but wanted to quickly revive my macbookpro11,4. Since the original ST-NGFF2013 had only one pin cracked away, I decided to pull out my trusty soldering iron and fix it. A quick dab of silver solder and the old ST-NGFF2013 was working admirably with my macbookpro11,4 again on May 30. It’s now a week later and not a single kernel panic. Better yet, Sintech agreed to send me a replacement rev. C/D ST-NGFF2013 and I expect to have that next week. Will report back afterward.

P.S. I purchased the ST-NGFF2013-D adapter on Amazon because I understood it may have a lower profile than the ST2013AM2. Maybe others can report in the comments what has worked better for them.

** Update 9-9-2022 **
I observed the first kernel panic with the repaired/resoldered QNINE board(!). I decided to pull it out and take a look at it, surely another pin has popped loose? Turns out I never soldered one of the grounds on the far side of the board – facepalm. I soldered the ground back down and instead of putting it back in service I put the board in my backup supply – surely it will work when I need it to someday, the disconnected pin was obvious and easy to see. Instead, I took the opportunity to install the repaired/resoldered ST-NGFF2013-D and it works fine!

** Update 9-22-2022 **
It’s been almost 2 weeks and the repaired/resoldered ST-NGFF2013-D continues to run fine without kernel panics – woohoo!

Thinking more about Sintech, Xiwai, or QNINE adapters, before I install any of these in anyone’s older MacBook, it makes sense to pull out a 10x loupe or better and inspect the pin connections on the adapter. If any have separated as shown above, heat the connections with a solder gun, apply silver solder, and everything should be fine. If that doesn’t help, consider using an eraser or fiberglass pen to gently rub the leads and remove corrosion.

Final thought: NVMe SSDs are a relatively long skinny board and on 2012-2015 MacBook Airs and Pros the SSD connects to the adapter at one end and is screwed to the logic board at SSD’s other end. I’m wary that over time a MacBook is flexed and can stress the SSD by pulling on the adapter end. Pulling on the adapter end is bad because the solder points and to a lesser extend the logic boards SSD pins are all that is holding the NVMe in place. Seems there’s no room to screw the adapter’s pin-end down, while a piece of kapton tape might help? The solder fix above isn’t bad if you have access to a soldering gun or a friend who does. And if you don’t mind being down for a few days, Sintech stands behind their adapters and will offer to send you a replacement. I didn’t bother to approach QNINE on a warranty swap, but maybe I should have?

** Update 9-22-2022 **
Tina said her MacBookPro12,1 was suddenly belching daily kernel panics, this after I put a short little QNINE adapter in her machine to accommodate a 1 TB drive. I opened her MacBook Pro, pulled the adapter, and inspected it with the 10x loupe. No broken connections. I decided to clean the adapter pad pins as they didn’t seem to be a shiny copper color any more. I’ve used white erasers in the past, but this time I used a fiberglass pen, which you rub on the pads using a circular motion. The pads are all shiny so I put the adapter back in her Mac and she said it is working fine today. Will update this later.

** Update 10-19-2022 **
Tina’s machine seems fine, but my macbookpro11,4 machine is having kernel panics. I switched out the long Sintech adapter and went to the short-form Sintech adapter, but 4 days later, on 10-23-2022, a panic occurred.

** Update 10-23-2022 **
I installed SsdPmEnabler to reduce power consumption while the SSD is sleeping. This driver will need to be reinstalled after every macOS upgrade, upgrade instructions are at the link above. If this doesn’t help, I may try supporting the adapter better (reportedly foam tape under it) so it can’t move while the machine is being transported. I may also try adding kapton tape to both sides of the adapter. If none of this helps, I’ll try purchasing a new adapter. After making the 10-19-2022 swap, the long adapter appears to need more solder work and it’s also possible the pins on the macbookpro11,4 need some buffing with my fiberglass pen if it will fit in there.

** Update 10-25-2022 **
Finally nailed it! The fix on 10-23-2022 did not work, but the fix is related to power. To temporarily get around the issue of your Mac being stuck in a boot-loop has nothing to do with the SSD, but potentially it’s power draw and a bad/aging battery. The temporary workaround is to disconnect your battery from the logic board and run off of the AC adapter. So far this is working flawlessly and I’m hoping the permanent fix is to purchase a new battery. I’ll place an order for a new battery and report back how it works.

** 10-26-2022 **
I never placed an order for a new battery, but noticed another video where a user disconnects the battery as I have above, boots the machine with the battery detached, shuts the machine down, and reconnects the battery. I did this and things might just be fixed. More tomorrow.

** 12-21-2022 **
While I ordered the FDMF chips, I am nervous to solder them in. My soldering and hot air experience have grown substantially in the last year-plus, but I didn’t want to wreck the macbookpro11,4. Anyway, I probably should’ve tried, I found the machine non-responsive this morning and it appears the CPU arc’d over. Damn it! I’m going to trade this logic board into iFixit for store credit and then pick up a new logic board, preferably one with a dGPU. Upgrade! I rarely give up on my Macs.

** 7-12-2024 **
I put the upgraded logic board in a machine for Liam and it has been working fine for him. I have my own macbookpro11,5 that I purchased from k-bid.com and it is starting to have the random shut-off now too. This is a warning that I soon need to replace it’s FDMF chips as others recommend.

Restoring CloudTabs.db

I’m terrible about opening lots of tabs and then quitting Safari twice to lose them. Or do you?

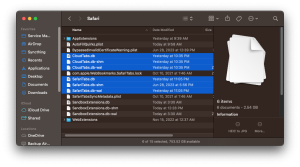
I’ve found if you have Time Machine running on your Mac, it’s possible to restore your lost tabs if you restore the Cloudtabs.db file, saved here:

/Users/(your user folder)/Library/Containers/com.apple.Safari/Data/Library/Safari/CloudTabs.db

I’ve been able to restore the file such that Safari will launch with all your tabs in place before you lost them, but I seem to have forgotten how I did that. As a temporary workaround, you can open the CloudTabs.db file with “DB Browser for SQLite“. After you double-click CloudTabs.db to open your lost tabs, click “Browse Data” to view your tab information.

When I lose all my tabs in another month, I may try to figure out how to do a quicker restore that brings back Safari’s window and tabs in the same place they were, but for now you get this post. According to my notes though, all I had to do was restore the history db files, but I think it’s more complicated than that… According to this one you just have to restore all 3 CloudTabs.db files, presumably they mean CloudTabs.db, CloudTabs.db-shm, and CloudTabs.db-wal? And the most interesting link is that the backup files have moved and now reside here:

~/Library/Containers/com.apple.Safari/Data/Library/Safari/CloudTabs.db

Will report more later when I can try this with my Time Machine backups at home.

Xtracycle SideCar enhancements

In 2013, Tina, Liam, and Ella gave me an Xtracycle SideCar kit and I’ve since logged several hundred miles with it, including trips with Suki. Last summer it received upgrades and it logged 500 RAGBRAI miles, so it was time to publish the success here:

1. For anyone who has a SideCar, you might notice the axle makes noise when hitting bumps in the road. If you’re willing to use a screwdriver in addition to the easy-to-use and push-to-release button on the SideCar’s lone wheel, you can remove most axle noise with a single 1/2-inch EMT conduit to 12/2 NM cable as shown in the pictures below.

2. Prior to last year, my SideCar’s tire went flat a couple times. After the first tire wore out, it was time to upgrade to a Schwalbe Fat Apple set up ghetto tubeless (this seems reasonable since tire pressure remains at 50 psi or less). Last summer, I was a cheap bastard and used a single layer of Kapton tape on the stock rim, which allowed a spoke to poke through after 500 miles. This year the Kapton tape was replaced with 2 layers of Whisky 30mm tape (if you try this, consider 25mm tape, 30mm is what I had on hand and it was a bit too wide), a Fattystripper, and 1 ounce of Orange sealant.

3. For bikepacking SideCar trips that need destination power, we mounted a solar panel to the SideCar’s deck and use it to charge Makita 18-volt battery packs. While riding across Iowa in 2021, I brought a pair of Makita 3.0 amp batteries and the solar setup charged them one at a time providing night-time charging for 3 iPhones. At camp, detaching the SideCar with the wheel attached gave it perfect angles for tilting toward the sun:

I strongly recommend this kit and really wish Xtracycle would start selling it again.

** Update 7-1-2023 **
The modifications above have been working fine. One additional note on #1, I realized the nut around the wheel’s button can be tightened or loosened to take up slack. This helps reduce some of the noise, but the key to making it really quiet is to improve the tolerance of the axle as it slides into the SideCar’s housing. I’ve been using a 2.25-inch wide by 1 7/8-inch tall shipping label that seems to have some plastic built into it. I wrap the label around the axle and then slide the axle into the housing. Will update later to see how this holds up, but the solution above helped SideCar cross Iowa a couple times, so I’d say it’s working.

AirPort Time Capsule ssh access

I’m trying to copy some Time Machine backups from one Time Capsule to another and permissions seem to be getting in my way. I’m hoping to circumvent this by using scp to copy files from one Time Capsule to another. Before I can do that, I need to get ssh access to each of the Time Capsules and I was having a heck of a time before I figured out a couple things.

Following these instructions (converted to English) and this thread helped, but the acp and airpyrt scripts would error out. This thread helped me learn that the airpyrt script cannot handle a number IP address, it must instead use the Time Capsule’s mDNS hostname AND for either acp or airpyrt the Time Capsule cannot have a password with special characters – I’ll report this back to Samuel in he or the other developers care to address it.

If you’re hoping to use airpyrt and your Time Capsule’s local IP address is “10.0.1.15” (adjust to your fit in command below) you can obtain its mDNS name through the following Terminal.app command:

dig -x 10.0.1.15 @224.0.0.251 -p 5353

(the output from this command will show a Time Capsule name that ends in .local)

In my case it was “Basement-Shop-AirPort-Time-Capsule.local” (I skipped the period after local).

After revising my Time Capsules passwords to omit special characters, I then used the following commands to install acp or airpyrt (take your choice although acp should be newer and can roll with number IP addresses). I’ll refine the commands below when I try again from a Mac that is not yet configured to make these connections.

First, I’m pretty sure we have to do this with Python 2, not 3, so use brew to install pyenv and enable it in Bash shell:

brew install pyenv
eval “$(pyenv init -)”
pyenv versions
pyenv global 2.7.18
python –version
pip install acp (might be able to skip this?)
npm install –global node-acp (might be able to skip this)

Or, if you prefer to use airpyrt, follow these instructions.

I followed some additional advice here:
https://www.reddit.com/r/jailbreak/comments/f01d2r/tutorial_how_to_jailbreak_an_apple_airport_device/
https://sites.google.com/site/lapastenague/a-deconstruction-of-routers-and-modems/apple-time-capsule-repair/change-country-on-airport-router

To do cute things like get a list of all MAC addresses connected to an AirPort, Josh has a ruby script. And Jörg is trying to mount the hard drive. Ray has all kinds of good stuff (link is likely broken, Ray disappeared?). Ray battles power supplies and temperature issues and changes country codes.

** Update 1-29-2024 **
To connect with OpenSSH_9.4p1 or newer, I had to use:

ssh -oHostKeyAlgorithms=+ssh-dss root@10.0.1.1

** Update 10-4-2024 **
To connect today, the above command worked until I disconnected and tried to reconnect. I don’t know why, but dropping the “+” symbol and using the following command helped to reconnect:

ssh -oHostKeyAlgorithms=ssh-dss root@10.0.1.1