About Brad

All-around tough guy.

Beats Solo 3 and Right Speaker Repair

Ella’s right headphone speaker stopped working on her Beats Solo 3 headphones. I found this guy’s video helpful, specifically the first half of his video. Her headphones appeared to have a wire that broke, so I ran some a couple inches of wire in the left headhphone and the right headphone appears to be working again, but Ella and I swear it cut out briefly – may be another break somewhere else.

I’m going to order some replacement ear cushions and if the cut-outs continue, I’ll just run replacement wire between the ear pieces. Also note, in the case of Ella’s headphones, another guy’s video did not help nor did this one, and this one might have minimal promise if I want to try and cut corners with the right headphone and replacing wire.

Quarter-Turn Stop Valves, Stop Buying Them!

The kitchen and bathroom in our house had several older water supply stop valves that required several turns to close and often leaked even when they were supposedly closed. When putting a bathroom in the basement 14 years ago I foolishly believed the older water supply stop valves were inferior to the newer quarter-turn stop valves that others bragged about.

After installing several of the newer quarter-turn stop valves I’m already finding them to have failed – when turned to the off position, they still allow a trickle or even a stream of water to flow out, and this is described by others too. The older style valves would also fail after several years, but they had rubber washer rebuild kits to rejuvenate the valve’s operation. In the case of the new quarter-turn stop valves, I contacted one manfacturer, Nibco, and spoke to a technical support person, Jeff. I asked if there was a rebuilt kit I could purchase for a failed valve I own and he said “No, none of the parts on that valve are field-serviceable”.

Look, I work for a company that makes a lot of money mine minerals from the ground, but it will be difficult to sustain this bleed rate on the planet if we’re constantly mining new minerals and, even if we scrap the existing valve, throwing energy towards making new supplies. Worse, replacing the valve isn’t even a one-to-one process. While I ultimately purchased a replacement valve of the same model from Menards, Nibco must have changed manufacturers because the new body was shorter than the last one and required me to shorten the 1/2-inch diameter copper pipe poking out from the wall. Putting a new rubber washer on an old style valve would have required 1/10 the time I spent installing a brand new quarter-turn stop valve body.

Don’t believe the hype, quarter-turn valves are great for a few uses, but long-term these valves will cost you more money and time. If you don’t value either, ignore this post.

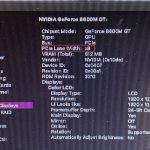
2008 MacBook Pro 17-inch A1261 GPU repair

My in-laws had an old MacBook Pro that they wanted the data wiped from, mainly because the display was missing vertical columns of pixels. I couldn’t bring myself to erase without figuring out what the issue was, surely others were on this years ago. Here’s a summary of people describing the issue with past and current fixes (the last I may attempt at a later date when I’m a bit more mobile).

Apple Community Support – Vertical lines of missing pixels on MacBook Pro

One customer saying that Apple replaced his machine

Apple’s Repair Extension, ended December 7, 2012

Here's what my sister-in-law's MacBook Pro Screen looks like

DosDude1 describes the repair, he replaces a defective Nvidia 8600M GPU on a 15-inch 2008 MacBook Pro

A1261 2008 17″ MacBook Prorepair.wiki

iFixit.com – MacBook Pro 17″ Models A1151 A1212 A1229 and A1261

Schematics and Boardviews Availability at logi.wiki

OpenCore Legacy Patcher and Ventura 13.2.1 Update

My macbookpro11,5 is rocking OpenCore Legacy Patcher (OCLP) 0.6.1 with Ventura. I recently updated from 13.2 to 13.2.1 and macOS updated after about an hour and a couple restarts and log-ins. Afterward, I attempted to use OCLP and its Post Install Root Patch feature and encountered an error message: “PatcherSupportPkg resources missing, Patcher likely corrupted!!!”, which left the macOS running without graphics acceleration (and a bit more slowly).

I first tried building OCLP’s nightly build code from my Mac, but I was left with the same message, above.

Finally, from OCLP’s “Build and run from source” page I clicked the link to download a pre-built binary. Using the pre-built binary to launch OCLP 0.6.2(n), where “n” equals nightly build, I then clicked the button to complete a Post Install Root Patch which loaded the proper GPU code and after a restart 13.2.1 is running nicely on my Mac.

Rohloff, Pugsley, and Shift Cable Replacement

I was replacing some housing on my Pugsley and noticed a few things that might be helpful next time.

First, the darn shifter pulley inside the external gear mech is a pain to get old cables out of. My shift cables refused to let the socket set screw to back out. Sadly, I had to drill all the way through the socket set screws with a 7/64-inch solid carbide standard length drill bit with a 118-degree point and then I reamed the shifter pulley’s threads out with a 4mm-70 tap. This works well, see pics below, just be patient so you don’t bungle the threads and drill straight already! I also found it helpful to drill out the old cable from the shifter pulley using a 1/16-inch drill bit (carbide not necessary for this one); however, this size bit will enlarge the holes for the shift cable – I didn’t see any issues with it for the final setup.

My Pugsley’s Rohloff kit has the old-school Rohloff shifters, so I followed the first 5:45 minutes of this video to remove the old cables and insert new cables. I did have to install one new cable housing, which measured 5 feet 11 inches for my XL Pugsley. For making connections to the external gear mech, I skipped 55 seconds into Rohloff’s video and continued along.

My Pugsley is back in business, though I still think shifting is stiffer than it should be. I may try fussing with the external gear mech’s angle to see if that reduces the stiff shifting.

ddclient, ZoneEdit, and macOS

I wanted a free solution to get macOS (and an Apache web server) working with Dynamic DNS offered by ZoneEdit. ZoneEdit’s DYN DNS instructions seem fine, but their macOS instructions seem a little out-of-date at the time I drafted this post. If you’re in a similar situation I hope these instructions help you:

  1. Install ddclient by opening Terminal and execute the following command:
    brew install ddclient
  2. Configure ddclient .conf file:
    pico /usr/local/etc/ddclient.conf
  3. Modify the .conf file between lines 83 and 88 by making the following edits:

    use=web
    web=api.ipify.org
    protocol=zoneedit1
    server=dynamic.zoneedit.com
    login=(username)
    password=(DYN auth token)
    wildcard=yes
    #your-sub-domain (this line is commented out in case I need it later)

  4. For the login and password lines, replace (username) with your ZoneEdit username and replace (DYN auth token) with instructions on the next step.
  5. To get your DYN auth token use a web browser and visit cp.zoneedit.com, log in with your ZoneEdit credentials, tap “manage” to the right of your domain name, tap the “DNS Settings” tab, and to the right of “Dynamic DNS” tap “DYN”. At the bottom of this page, click “view” to display your DYN Authentication Token. Copy your DYN Authentication Token and use it for Steps 3 and 4.
  6. After doing all of this, restart your system and ddclient should take over on its own. For whatever reason, I had to restart my machine twice, but I might not have been patient enough after the first try.

Extra helpful bits:

You can adjust the execution interval by changing the value of
StartInterval (in seconds) in /Library/LaunchDaemons/homebrew.mxcl.ddclient.plist.

To restart ddclient after an upgrade:
sudo brew services restart ddclient

Or, if you don’t want/need a background service you can just run:
/usr/local/opt/ddclient/bin/ddclient -file /usr/local/etc/ddclient.conf

Thanks to this community post this DYN DNS solution for macOS was pretty easy to set up. Read about brew’s configuration for ddclient here. If you want to revive something more legacy with a macOS interface, this might be worth a look if it is updated.

Tunnelblick and MFA

My favorite VPN server had maintenance last night and this morning my Mac would no longer connect. The error message told me the username and password were incorrect, but this was not true. After opening Tunnelblick’s log, I quickly found that there were TLS errors – yes, seems the VPN server operator renewed the certificates!

Easy fix, I downloaded the latest certificate and profile by logging into my provider’s WatchGuard VPN website, downloaded the latest profile, cleaned out my previous passwords in Keychain, and logged back in. Note: to log in, I had to use the username “MFA\bcs”, where MFA\ represents the domain for multi factor logins. I’ve got more detailed notes on this, but until people request the details in the comments I’ll stop here. Also, for those just wanting to delete their cached Keychain credentials to start over, check out these instructions, and in my case it was useful to use these to see what domain I had logged into when my credentials and TLS certificate had previously worked.

Homebridge update and execvp failed

I was trying to use homebridge-ui to update home bridge and one of its plugins today when this error message popped up:

execvp(3) failed.: No such file or directory.

To get around it, I logged in to the headless Mac mini, opened Terminal, and pasted in:

npm install -g homebridge@1.6.0

It installed without a hitch. Returning to homebridge-ui in a web browser I was able to initiate the plugin update and this time it worked. I’m not sure why, but I’ll take it as a win and move on.

SSD and TBW on macOS

I had another NVMe SSD die in my macbookpro11,4. I would’ve been curious to see what the TBW (terabytes written) was before each of them died.

After installing a new Samsung 970 yesterday and restoring from my Time Capsule with Time Machine, I fired up Terminal.app and ran the following commands:

diskutil list
(this showed me that disk0 is my new 2TB SSD)
iostat -Id disk0

The second command reported that the SSD has written 181476.09 MB in its life so far. This seemed low, since 900 GB of data were restored to the SSD…

LIFX, HomeKit, & Homebridge

We picked up a replacement LIFX Z Strip adapter for Liam this past summer and it seems we didn’t have the HomeKit code recorded anywhere. Using LIFX’ instructions we were able to see where it was suppose to be, but the sticker was cracked up and deformed – luckily we still made it out.

Then we noticed HomeKit incorrectly showed one of his older Z Strips, added using a Homebridge plugin, needed a firmware update. Seems the HomeKit plugin needs to be tweaked to allow older LIFX firmware versions to remain. shuether figured this out on a similar plug-in, so I brought it to the attention of folks on the homebridge-lifx-plugin. Hopefully they can help me develop a fix or workaround.