About Brad

All-around tough guy.

Surly Gen 1 ICT and Tubeless

My daughter loves her Ice Cream Truck, but she tires out on longer rides. Her brother rode it for a year and a half before growing out of it and rode it with tubes, but I knew tubeless was an option to drop rotational weight.

In 2012, the ICT came stock with Rolling Darryl rims and Nate tires. While both are officially clinchers, many have tried and succeeded going tubeless. I wanted to put my own spin on ghetto tubeless, using off-brand tape and homemade sealant.

For the tape, I bought 50mm wide by 36 yards of a kapton tape, which is maybe what Fratelli tape is. From sealant advice of others, I used one part Mold Builder mixed with 3 parts water (by weight). While that worked just fine for me, I plan to swap the water for blue windshield washer fluid next time.

For each successful tubeless build, I removed a tube (11.4 ounces) and added kapten tape (1.3 ounces), a presta valve (0.1 ounces), and sealant (2 ounces) for a savings of 8 ounces per tire. If I ever have to pull of the kapton tape and do it again, I’ll trim the rim tape a bit narrower (this will pull another 3 ounces of weight from the build and make a better seal with the rim.

My first attempt with the front wheel failed miserably. A tape seam near the presta valve appeared to fail allowing sealant to bubble out around the presta valve and nearby rim spoke holes.

My second attempt with the front wheel is still holding up, albeit with a slow leak that I suspect originates with the valve itself. Once again, I left the Surly PVC rim tape (60mm) on the rim and covered it with a tight layer of kapton tape down the middle and then a wrap on each side; 3 total passes of tape around the rim, each pass starting before and ending after the weld joint. I poked a hole with a round file and cleaned the valve hole out. I then blew the tire up with a tube to 30 psi and let it sit a couple hours to fully seat the tire. After that I loosened the bead on one side of the tire, gently removed the tube, inserted the tubeless presta valve, rotated the tire label to the valve, and filled with 2 ounces of sealant. I then placed the loose portion of the tire back in the rim and laid the loose side facing the ground while sitting on top of a 5 gallon pail. Gravity was my friend, pulling the loose bead toward the rim for the air compressor to inflate the tire.

Both tires inflated quickly. The front tire seems to have a slow leak between the rim and tire bead that I’ve been able to fix most of, but can’t quite find the last part. I fix it by inflating the tire and pushing on the sidewall of the tire until sealant hisses out. I may need to dunk the tire in a tub to figure out where the last couple leaks are, but it holds pressure for about 6 hours before going flat. The rear tire has been holding pressure throughout the night.

I’m pumped with the kapton tape and cheap sealant approach and inspired to toss it in my son’s Krampus with 27tpi Knards. I perused this guy’s approach and will probably combine it with mine.

** Update 10-4-2020 **

I’m nearly certain there’s a valve leak on the front wheel. It deflates once a day and when reinflating I’ve noticed that the valve is stuck and I have to press it with my finger to unstick it so the pump can inflate it. Surely the sealant is trying to patch the valve’s leak! More on this later.

** Update 11-1-2020 **

A couple weeks ago, I was riding on train tracks with Ben up until my ride ended abruptly. The front tire took a v-shaped slash that the sealant couldn’t repair mid-ride. The quarter inch slash finally sealed after about 5 reinflation efforts back at home, but it required removing the tire from the rim. After putting the tire back on the rim, I found so many leaks between the rim and tire bead that I decided it was time to purchase a set of FattyStrippers.

** Update 11-6-2020 **

FattyStrippers arrived today. Install one on Ella’s front tire that I popped a couple weeks ago. I peeled off all the sealant on the rim bead to start fresh (probably foolish, but I figure the FattyStripper will replace most of what I’m removing and I also want the tire to be able to slide on the FattyStripper when I inflate it.

I followed the FattyStripper instructions, but couldn’t get the beads to seat. I probably should have tried harder, but decided to toss a tube in fast and that seated both sides immediately. Pulled the tube out, put the valve back in, and reinflated by placing the wheel’s spokes on top of a garbage can and pressed the loose side of the tire into the rim with both my thighs and a free hand while using a bike pump to inflate, it worked! I then popped the valve core out, squirted in 3 ounces of sealant, replaced the valve core and then reinflated the tire. Sealant still oozed out of the rim bead area as described in previous posts, but it didn’t seem as bad. I’ve continued shaking the tire as shown in my previous post and allowing it to rest 10 to 15 minutes before shaking again and placing on its other side. So far its working and fewer and fewer leaks remain with each flip. This better work, because we’re riding to see Melvin Carter talk at Ayd Mill Road in the morning.

HomeKit, Apple TV 4K, and Receive Errors

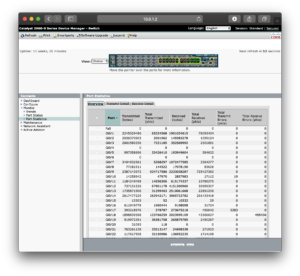
Since May, our Apple TV 4K running tvOS 13.4.6 (as of this morning) was having problems continuing to function as our HomeKit hub; others have reported issues with past versions of iOS. It seemed to work fine though earlier version of tvOS and seemed to start exhibiting HomeKit connectivity issues back in May 2020 when I upgraded from an SMC 100Base-T ethernet switch to a Cisco WS-C2960S-24TS-S gigabit switch. After upgrading switches, my family and I noticed using Home app outside of our home’s wifi was no longer working with HomeKit or it would take two attempts to get it to do something. With the Cisco managed switch, I was able to see half a million “Total Receive Errors”:

screenshot

WS-C2960S-24TS-S

I stumbled upon Richard_W‘s post and tried two things to fix the situation:

1. Upgraded to beta of tvOS 14 and rebooted.

(the problem persisted, only now a red warning bubble appeared in front of Settings->HomeKit)

2. Reset the Apple TV 4K (Settings->System->Reset) and set it up from scratch.

After completing Step 2, I reconnected the Apple TV 4K to iCloud and HomeKit. After 30 minutes with the Apple TV 4K sleeping, so far it seems to have resumed its Home Hub duties without spamming the Cisco switch with error messages while it sleeps – woohoo!

For the record, since completing the reset, the Apple TV 4K’s “Total Receive Errors” are holding steady at 495,436. I’ll continue to post updates here if the problem returns.

KitchenAid KSCS25FJSS01 Door Cam Kit

We noticed the right side door of our KitchenAid KSCS25FJSS01 wasn’t closing as well as it use to, it seemed the door would always get stuck open whenever someone pushed it shut.

I reviewed the KitchenAid parts guide and it shows 2182179 (Door Closer, Upper Cam) for the refrigerator door and 2208137 (Hinge & Cam Assy) for the cabinet, each on the lower/bottom side of the door hinge. Our freezer door works fine, so I didn’t bother with parts for that.

Part 2208137 seems to be expensive, not in-stock, and includes the metal bracket, which isn’t worn and fully intact on our fridge, so I figured there must be a cheaper way.

Instead, I decided to roll the dice on part number 4318165, which doesn’t appear in the KitchenAid parts list. This part is a set of plastic cams where most of the hinge-wear occurs. Watching this video shows the cams are easy enough to replace.

After the door cam kit arrived, I took the door off of our fridge and found the existing door cams are riveted to the steel bracket! My trusty Dremel and cut-off blade ripped through the rivet and existing door cam and I used an 8mm screw and nut to replace the rivet.

After getting the door back on, the fridge door is fixed. Better yet, the door cam kit comes with two sets of cams and since our freezer door cams don’t require replacement at this time, I’ve got an extra set of cams I can use on our heavy door after it wears out again. Note, next time the replacement will be much easier now that the rivet is history.

** Update 9-20-2020 **
The door was starting to slip again and I thought the cam bolt had loosened and it might need some thread-lock, but I was wrong. When I pulled the door off and inspected everything, the cam bolts were still snug, but I realized from last month I had been unable to get the hexagonal cam shaft out of the refrigerator, because the hexagonal shaft broke off inside. Because the old hexagonal shaft remained, I was unable to insert a new cam with the the hexagonal shaft in the lower right corner of the refrigerator door and instead used another bottom cam flipped upside down to replace the lower corner upper cam. Since the new upper cam wasn’t connected to the hexagonal shaft, it would pivot and shift when opening the refrigerator door.

Quick fix. Pulled the door back off and used a No. 5 screw extractor (9/16 – 3/4 inches, M14-M18) to removed the old hexagonal cam shaft. After the screw extractor was fully seated, I was able to rock the drill (off) in a circular motion while pulling away from the refrigerator door and out the old hexagonal shaft popped.

With the old hexagonal cam shaft fully removed, a new upper cam with hexagonal shaft could inserted – woohoo! After putting the door back on and tightening up the bolts, the door is working better than ever. I also noticed that the upper cam’s hexagonal shaft seems to help boost the door up a millimeter or two, so its now perfectly flush with the freezer door to the left – hell, yes! For anyone reading this or operating a refrigerator as old as ours, I strongly recommend you do the repair – very satisfying and a cheap fi

I still haven’t bothered with the freezer door’s cams. The kit comes with cams for both doors, so I’ll save the extra cams for when we wear out the main door cams again, the cams are the same, but its obvious the main door carries much more weight.

iPhone 7 Screen Replacements

Liam’s black iPhone 7 has suffered a broken screen a couple times this year, so we’ve had the pleasure of trying a few different replacement screens that we installed ourselves. For his first replacement, we tried this one sold by Miardo:

https://www.amazon.com/gp/product/B07ZQWYT1Y

The initial shipment of this screen was so bad we sent it back to Amazon and requested a replacement – the screen was ridiculously, as Liam says, “laggy” in response to any touches. The replacement to the replacement improved on the lag in touches and being an improvement over the first shipment, Liam decided to keep it. It lasted 6 months before he got flipped by a buddy and the phone shot from his pocket on to sidewalk, requiring us to look for another screen replacement.

For the next screen replacement, we decided to shake things up and try a different listing on Amazon. This time we tried bought from the seller Koofix and picked up this model:

https://www.amazon.com/gp/product/B07XWYM6LS

Good news is, the tap responsive is wonderful and Liam loves it! He says the touch responsiveness is back to feeling like an OEM screen, so I’d consider this a win.

And hopefully this one also lasts longer than the last one.

macOS Server and port 8080

I’m stubbornly keeping macOS Server on my Mac mini running High Sierra, as I love it’s GUI for controlling server components. I understand macOS Server wasn’t a profit leader for Apple, but it was such an elegant solution for some of us! Darn it, my mini will probably get hacked for its server components being out of date before someone pries my fingers off macOS Server.

Anyway, today I noticed I was suddenly having conflicts trying to launch Homebridge on port 8080 after installing a security patch on High Sierra. It appears the security patch messes with macOS Server’s web server settings. Fortunately, mighty Wayne Dixon encountered this issue on Mojave and published a fix. Thanks, Wayne! I changed mine from 8080 to 8081.

For now I’m back in business and reading Wayne’s solution might have tempted me to try Mojave if this mini was compatible and it won’t be unless I also try DOSDude1’s app to load Mojave… Hmmm, I’ll think about it…

Also, I briefly thought someone had hacked my server for their own use of port 8080, but this advice quickly helped me track down what it was with these commands:

sudo lsof -i :80 # checks port 8080

Then I saw something similar to:

COMMAND PID USER FD TYPE DEVICE SIZE/OFF NODE NAME acwebseca 312 root 36u IPv4 0x34ae935da20560c1 0t0 TCP 192.168.1.3:50585->104.25.53.12:http (ESTABLISHED)

Which showed a service using the PID and we probe that further:

ps -ef 312

To see:

UID PID PPID C STIME TTY TIME CMD 0 312 58 0 9:32PM ?? 0:02.70 /opt/cisco/anyconnect/bin/acwebsecagent -console

Mine showed an Apache2 folder that I led me to Wayne’s fix above.

Rohloff Jockey Wheel Replacements

While moving components over to my new Blacktacular frame, I noticed that I was using the wrong tensioner bolt and inadequate spacers for for my chainline. My Military Green Big Dummy has the new chainring set up, which unfortunately I goofed and left the old 8253 tensioner bolt in place and not enough spacers to reach a 58mm chainline. With the Blacktacular frame, I’m getting it right.

Fortunately, I already had the spacers and the 8255 tensioner bolt in my bag of Rohloff parts, so I installed them. With the corrected 58mm chainline in place, I also noticed the tensioner jockey wheels were trashed after only a year of use, but operating them at a 54mm chainline certainly didn’t help. I’ve faithfully purchased Rohloff jockey wheels, but its always bugged me that they are expensive, plastic, and take a while to get here in the U.S.

Time for a jockey wheel replacement and here’s my latest workaround. I purchased these 10t jockey wheels on eBay. The wheels are aluminum and have removable dust covers, which is key. I removed the dust covers and drilled through them with a 1/4-inch drill bit. Take care to drill slowly and keep the drill bit straight and center. After you fully penetrate the dust cover, you’ll need to ream the whole out by running the drill bit at angles, which I did in a circular motion. Reaming the dust cover with the 1/4-inch bit will make them large enough to slide over the tensioner’s axle and you’ll only need to do this for the upper pulley. I’m sure Rohloff has a good reason for using different size tensioner axles and the lower axles narrower diameter allows it to work with stock 10t jockey wheels.

After replacing the dust covers on the 10t jockey wheel and installing both on tensioner, its back in business and works great. Not to mention it looks good. After drilling out one set of dust covers, I’ll be able to move these dust covers to my next set of jockey wheels when I wear these ones out, which could be as soon as next year?

Big Dummy and Rust-Proofing

Minnesota winters are fun; however, the chemicals used by public utilities to fight road ice makes conditions harsh for bicycles. Back in February, the back of my Big Dummy frame rusted and broke off, this was after I applied boiled linseed oil to the inside of the frame twice; once in 2011 and once in 2016.

Surly was kind enough to offer me a crash discount on a new frame. I lusted for the Big Fat Dummy, but I’m still loving my Rohloff rear hub and having recently picked up a second Rohloff, I struggled with leaving my 135mm Speedhubs and having to get new ones with the 190/197mm spacing – that would have cost me several thousand dollars.

I was sad to pull my Military Green frame with swooping top bar out of service, but thanks to Freewheel, it was easy to move my components over to a new Blacktacular frame. Before building it up, I applied boiled linseed oil and while doing it, I noticed why my last Military Green frame failed where it did. The curved bars that rusted through, just behind the rear wheel dropouts, are only 16mm in diameter and getting boiled linseed oil to go back there is difficult. To anyone riding winters with their Dummy, I strongly encourage you to spin the frame in all directions and plug the weep holes to make sure you’re getting a good coating on the curved bars behind the rear dropouts. I’ll keep you posted how long this frame lasts 🙂

macOS Server on Catalina and php 7.3.8

I’ve posted ways to update php on macOS Server. My Mac mini is now running macOS Server 5.6.1 on macOS High Sierra and WordPress dutifully reminded me it is time to update php to a supported version, so read on for how it came together.

Before hitting the steps below, High Sierra’s sandboxing and needing to edit system files are difficult unless you boot from recovery mode to temporarily disable SIP, “csrutil disable”. Or, if you have the luxury I have, I was able to boot from my backup and edit my main drive. Doing this allowed me to delete Apple’s libphp7.so file from “/usr/libexec/apache2”.

1. Open Terminal and execute one line of code to get the latest stable php version, 7.3.8 at the time of this post, using the following command (and yes, even though below says 7.3, it will grab 7.3.8):

curl -s http://php-osx.liip.ch/install.sh | bash -s 7.3
sudo pico /Library/Server/Web/Config/apache2/httpd_server_app.conf

The second command allows you to edit “/Library/Server/Web/Config/apache2/httpd_server_app.conf”. Search for the line with “php7_module” and change the file path to point to the new libphp7.so file:

LoadModule php7_module /usr/local/php5/libphp7.so

Notice that this path is different than “/usr/local/php4/php5-7.3.8-20190811-205217”, but the above path has an alias that points to 7.3.8 and should enable future upgrades (hint, when we’re ready for php 7.4 and beyond).

2. Verify that the updated php is running with the following command:

schwie:apache2 bradschwie$ php -version
PHP 7.3.8 (cli) (built: Aug 11 2019 20:50:16) ( NTS )
Copyright (c) 1997-2018 The PHP Group
Zend Engine v3.3.8, Copyright (c) 1998-2018 Zend Technologies
with Zend OPcache v7.3.8, Copyright (c) 1999-2018, by Zend Technologies
with Xdebug v2.7.2, Copyright (c) 2002-2019, by Derick Rethans

3. To verify that php 7.3.8 is running on your webserver, restart your machine (or restart the Apache web server from Terminal):

sudo /Applications/Server.app/Contents/ServerRoot/usr/sbin/server-apachectl graceful

To complete this verification, I recommend temporarily placing an “info.php” file on your webserver to know which php version your webserver is relying on and where the php.ini file is saved. Mine was stored here “/usr/local/php5/lib/php.ini”. I keep the info.php file on my server, but for security purposes I recommend commenting out the body of the file after obtaining your php configuration information.

4. After completing step 3, I moved back to my blog and noticed all sorts of JIT errors. Others recommended disabling JIT from the php.ini file linked above, so I did the same by adding:

pcre.jit=0

5. Finally, my blog was complaining that it didn’t have the imagick php extension. My server has brew, so adding imagick is pretty easy using Mattias’ instructions, but after his step to install imagemagick, install autoconf to avoid errors with the pecl command:

brew install autoconf

So far so good. I’ll keep you posted when I make changes or move along to 7.4.

Last note, I also looked at instructions posted here, but I don’t believe I needed them in the end.

WinShortcutter and Catalina

After starting with a clean install of Catalina, I also installed WinShortcutter and found that it no longer properly showed itself properly in System Preferences with the prefpane not fully expanding downward to show all of WinShortcutter’s advanced settings. I also noticed that Tech-Arrow seems to be continuing development of WinShortcutter, but I wanted to continue using Lobotomo’s free version, so that’s why I wrote this.

The issue above might have something to do with Dark Mode in Catalina, as I noticed that even after following the steps below, WinShortcutter’s prefpane doesn’t do Dark Mode like the rest of System Preferences prefpanes. This fix won’t correct that and you should maybe consider Tech-Arrows product if you need that feature.

For this fix, it helps if you have a backed copy of your old system preferences. Lobotomo’s archived forums indicate WinShortcutter’s settings are saved here:

~/Library/Preferences/com.fribi.WinShortcutter.plist

I had the fortune of grabbing a copy of the above .plist from my last back up. If you don’t have a copy, feel free to use mine. I then replaced the existing .plist with the copy from my back up. When I re-entered System Preferences, it failed to import my old WinShortcutter settings, but now the window fully expands to show the advanced settings, woohoo!

I was then able to finish configuring WinShortcutter again, which included getting the Services menu to let me copy Windows files paths for outgoing emails. Tech-Arrow’s user manual led me to configuring Services properly by going to System Preferences->Keyboard->Shortcuts and putting a check next to “Open as Windows Link” and “Copy Path to Clipboard”.

** Update 6-13-2022 **
I’m amazed that Lomotomo’s free WinShortcutter 3.5 still works under Monterey. Also note, I now disable “Copy URL to Clipboard” in Preferences->Keyboard->Shortcuts as it doesn’t really seem to provide any value.

Kombucha!

Over the shelter-in-place period, Ella and I broke into making soda pop with our first batch of ginger-ale. We soon realized if we added more yeast and let it ferment longer, we’d get more fizz. We started reading a book on soda pop, but I remembered folks in my ‘hood spoke of making kombucha. Reading more about it, kombucha is made from a SCOBY, a symbiotic culture of bacteria and yeast – how cool! As long as you feed the SCOBY sugared up tea, it will do the job of helping to make a fizzy drink.

The excellent Lindenfelsers’ gave me a perfectly simple recipe: brew 6 cups tea, dissolve 1 cup sugar, and when it cools add your SCOBY to brew for 2-3 weeks. I’m using their basic recipe before I get silly on second fermentations with fruit, but I also wanted to read more about it. For those of you considering breaking into the hobby, here are a few websites I found interesting, with the first one going into some of the science that I gladly appreciate:

  1. https://scienceandfooducla.wordpress.com/2015/11/10/kombucha-brewing-the-process/
  2. https://ifoodreal.com/flavoring-kombucha-how-to-make-kombucha-fizzy/
  3. http://www.picklejarstudios.com/strawberry-rhubarb-kombucha/

I have been brewing kombucha in a large mixing bowl covered with a dish towel and a rubber band around the top. After the first fermenting period is complete, I pour the bowl through a fine-mesh strainer and into another bowl with blended fruit or straight into bottles, always reserving one cup of kombucha from each batch and the SCOBY for your next batch.

For the bottles, I biked to a liquor store and bought a 4-pack of the delicious Grölsch, but you might want to explore other options here:

https://myfermentedfoods.com/kombucha-bottles/

Also, I’ve only been using black tea for the fermentation period, but after I research whether or not caffeine is needed, I may start branching out with tea flavors as Ellen repeatedly told me. Oh, and I also grew a baby SCOBY on the side for Lurch:

Baby Scoby

Wes’ baby SCOBY

Will report back more later, but our first batch of strawberry rhubarb kombucha was definitely tasty and explosively fizzy 🙂 I’m tracking batches with this spreadsheet.